

Player Guide: Airsoft CQB Tactics - Slicing the Pie
Slicing the Pie - How to Clear a room when Airsoft Skirmishing
To "slice the pie" in terms of CQB tactics is to clear a room from a corner segment by segment, with the centre of the "pie" being the apex of the corner/obstacle which obstructs the shooter's view of the targets within the room. The idea being to "slice" the room into segments, clearing each segment before moving on to the next whilst only exposing your body to the segment you are currently engaging, and those segments which have already been cleared. To better explain this we have set up a little scenario, involving our hero, Stick Stu, and 3 targets, which will be referred to as X-rays 1 through 3, because we are Operator AF here at Patrol Base, and Tango is a drink!
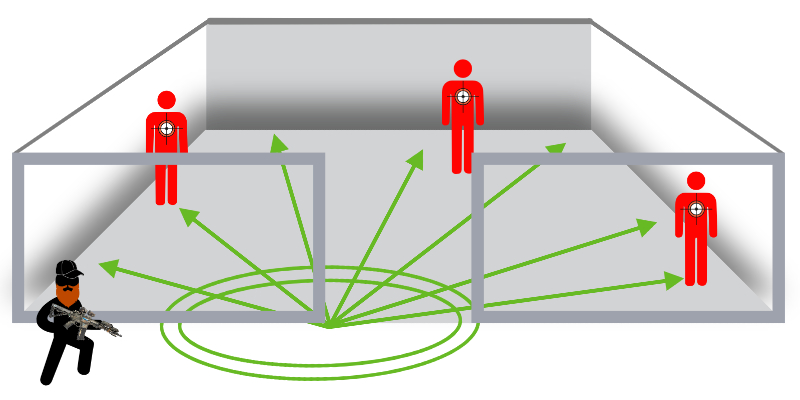 Here we see Stick Stu approaching a doorway, he knows there are X-rays inside, he can hear them arguing about which is better, the AK or the M4: "I don't know why you use that heavy, unergonomic hunk of sharp metal, Vlad", "Because I go to gym and I have strong hands, like REAL man!" "WHAT!!? Ever heard of Chris Costa Bro!!!..". Stu is going to keep his distance from the wall itself, as this will minimise the amount of his body which will be exposed to enemy fire.
 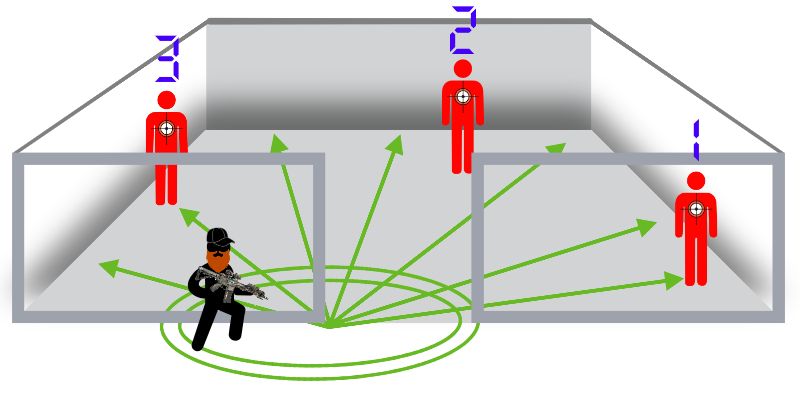 At this point, Stu is preparing to engage. He has chosen to take this room from the left corner, allowing him to keep his rifle shouldered with his dominant hand. Keeping in mind what parts of his body are exposed to which segment, and staying back from the door as far as possible, Stu prepares to clear the room, starting with the first segment, and X-ray 1.
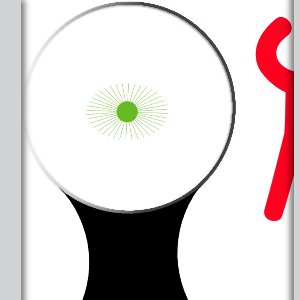
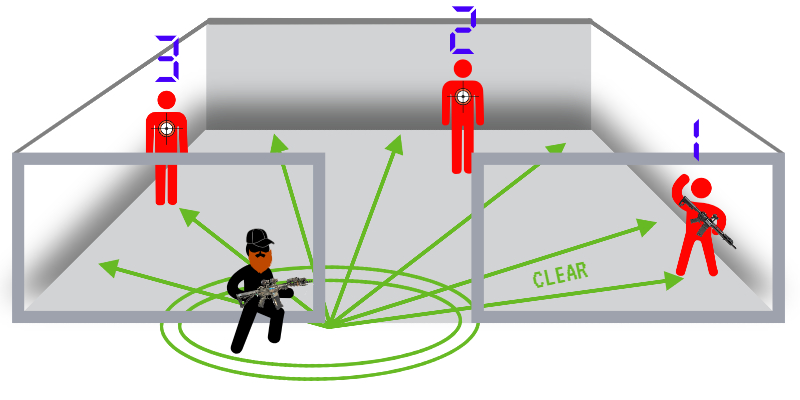
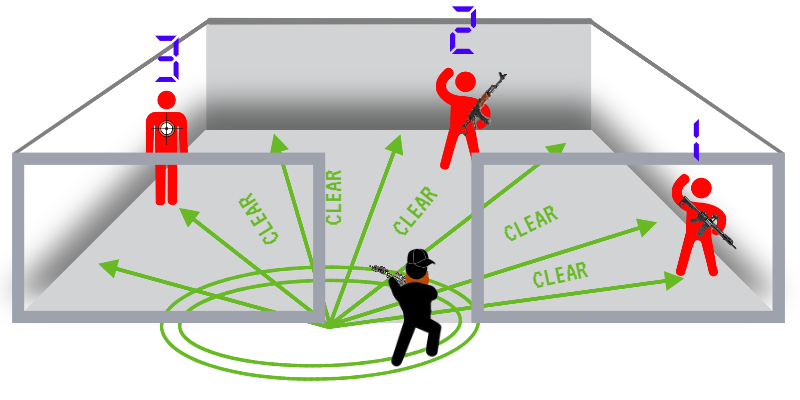
As Stu moves closer to the wall, he can now see the first segment of the imaginary pie, and into his view comes X-ray 1. Stu happily engages X-ray 1. X-ray's 2 and 3 know they are in trouble, but they cannot see Stu to return fire effectively. By only exposing himself to a single segment of the pie at a time, Stu eliminates the chance of being engaged by one X-ray whilst he is dealing with another. The picture adjacent shows Stick Stu's point of view. He is running his optic on green dot mode, because the X-rays decided to wear red today.
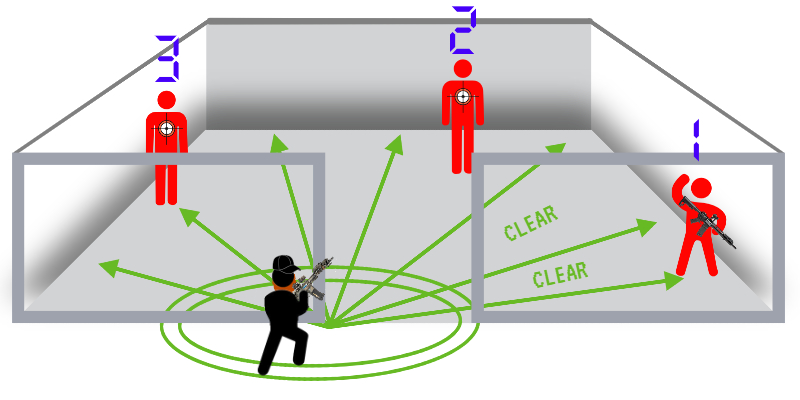
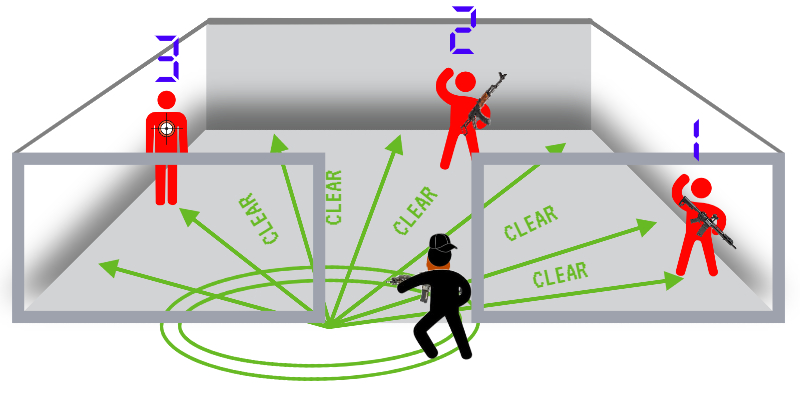
With X-ray 1 down, Stu steps out from the cover slightly, bringing the second segment into his crosshairs. There are no X-rays in the second slice of the pie, but Stu is able to clear this segment without exposing his body to X-rays 2 and 3, who he cannot see. Stu is visible to X-ray 1, but since he has already cleared this segment he is safe.
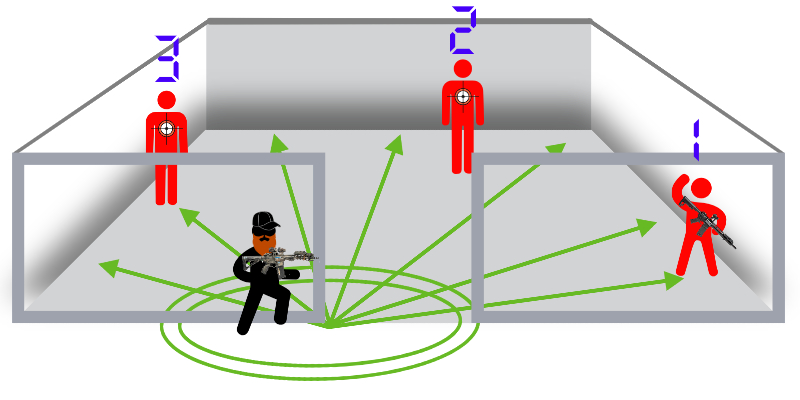
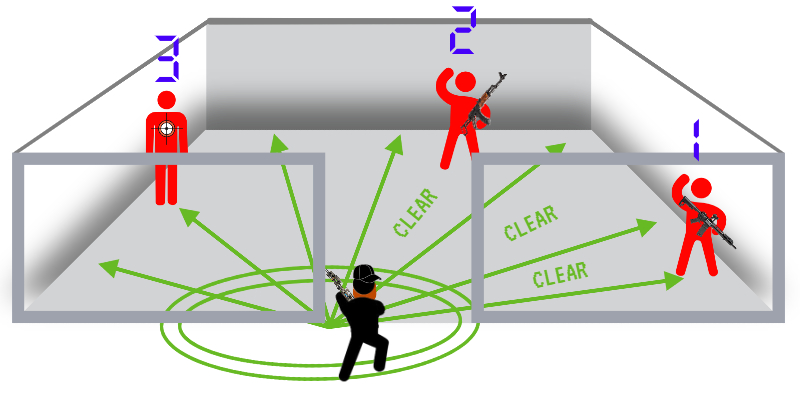
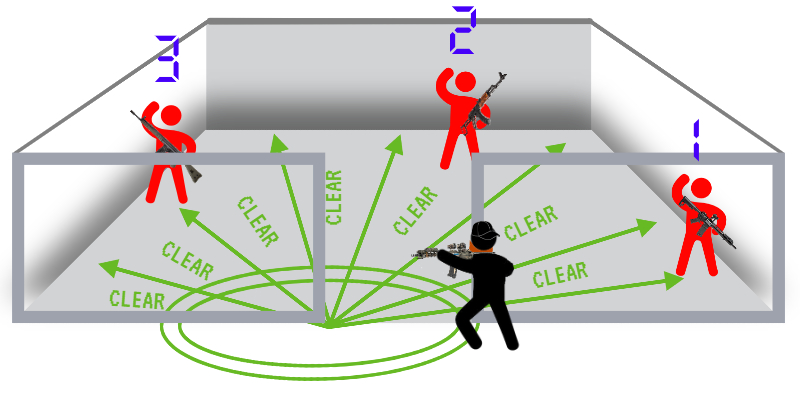
Stu steps out around the circumference of the Pie in search of more X-rays. He sees X-ray 2, who is expecting resistance given the untimely death of his mate, X-ray 1. X-ray 2 sees Stu and engages. Because of Stu's advantageous position, and his effective use of cover, he bags X-ray 2 and continues to search and clear the room. X-ray 2 is unable to land a hit on Stu as only a very small portion of his body is exposed to X-ray 2, who has no cover. X-ray 3 knows he is in the *beep* right now, he knows Stu is at the left side of the doorway but still cannot see Stu to engage him.

X-ray 2 is now down, and for Stu the work is nearly done, but he doesn't know that so continues to search and clear the room, quickly clearing each segment and closing in on the last X-ray. The lone bad guy definitely knows where Stu is now, but it won't help him because Stu is still not visible to him, and all he has to shoot at is an empty doorway.
Poor X-ray 3, he knows his days are numbered. Stu's barrel, and optic, head, and right arm come around the corner, but he keeps the rest of his body in cover. X-ray 3 has now had plenty of warning that Stu is at the door, but has only a very small target to shoot at. This is the point where Stu will be at a disadvantage because he does not know the location of X-ray 3, but having narrowed down the area of the room that the contact could be in and by using cover effectively, Stu may still be able to bag this filthy X-ray.
X-ray 3 comes into view, and already has his primary pointed at the door, he fires but he doesn't hit Stu, because Stu uses cover effectively by only revealing himself for a fraction of a second at a time, and by varying his stance between kneeling and fully standing. He nails X-ray 3, who is beginning to regret bringing his full length G3A3 to a CQB skirmish. After hearing the anguished cry of "HIIITT" from the room a third time, and hearing no more incoming fire, Stu suspects the room is now clear. Taking no chances, he continues to slice the pie until he has fully searched and cleared the room.
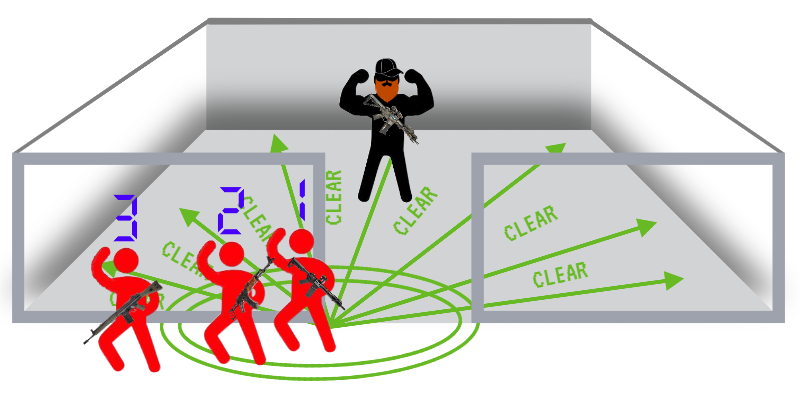
After searching the room as thoroughly as he can from his concealed position at the door, Stu enters, to find the X-rays inside have all been hit. He takes a moment to celebrate his skillful room clearance with a well-earned victory flex.
And there ends our first CQB Tactics Guide, having read this you should have a decent understanding of how to use the "slicing the pie" method of clearing a room or area to your advantage in an Airsoft skirmish. As a guide, you should slice the pie and clear a room as quickly and thoroughly as you can, but not at the cost of exposing yourself to enemy fire.
If you are in Law Enforcement or the Military, you should probably ignore this entire article as there is much more to this technique when it is used in real world scenarios by professionals with their lives on the line. As it pertains to Airsoft, this will suffice, as we will always only be looking for a human with a gun in the open or behind basic cover, and rarely if ever improvised explosive devices, dangerous animals and people hiding in wardrobes with knives, amongst other threats which may appear when clearing a room as a Soldier or LEO.
If you like what you have read and want more CQB tactics tips, stay tuned! This article is the first of a series where we at Patrol Base share our skirmishing tactics knowledge to help give you the edge in your next game! All that we ask is that you don't use these techniques on us, but we forgive you if it happens, and will return the favour when we get back from regen!