
Delta Armory EAGLE™ - Programming, Reset & Trigger Setup Guide
The Delta Armory EAGLE™ ETU unlocks faster trigger response, programmable fire modes and improved consistency, but only if it's set up correctly, which is exactly why we’ve put together this programming and setup guide.
EAGLE™ ETU PROGRAMMING INSTRUCTIONS
A lot of Delta Armory Airsoft platforms come with the Delta Armory EAGLE™ Programmable MOSFET Control Unit preinstalled.
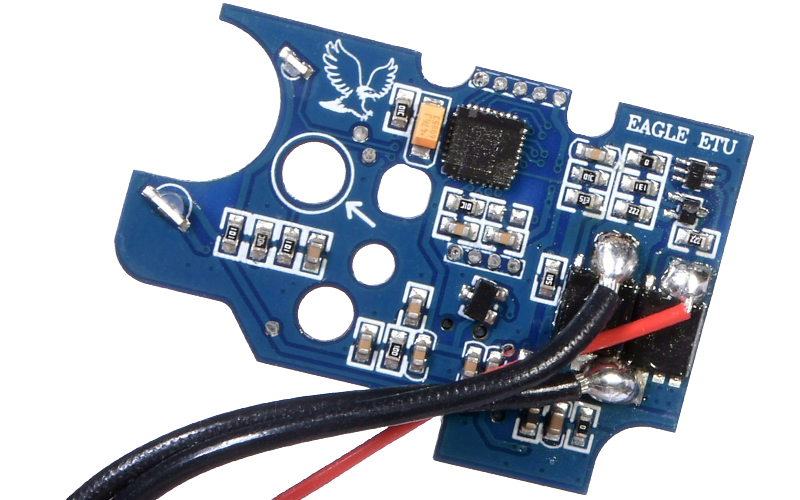
This high-tech electronic control unit improves an airsoft replica’s trigger response by increasing electrical efficiency and replacing traditional trigger contacts with magnetic sensors. The result is a faster, more consistent trigger pull. One of the biggest advantages of a MOSFET, however, is the range of programmable features it unlocks, all of which we’ll walk you through below.
How to Enter the ETU Programming Menu
-
Set the selector switch to SEMI
-
Press and hold the trigger
-
Release when you hear a beep
You’re now inside the ETU programming menu. Make sure the replica is not loaded when attempting to programme the fire modes.
Selecting a Programming Branch
ETU features are grouped into branches. Each branch controls a different function.

-
Once in the programming menu, pull the trigger to cycle through branches
-
The ETU confirms the branch number with audible beeps:
-
1 beep - Branch 1 - Configure the fire mode assigned to the full-auto selector position.
-
2 beeps - Branch 2 - Configure the fire mode assigned to the semi-auto selector position.
-
3 beeps - Branch 3 - Configure between 5 levels of trigger pull sensitivity
-
4 beeps - Branch 4 - Configure between 6 levels of piston precocking
-
5 beeps - Branch 5 - Configure whether active braking is enabled or not
Once you hear the correct number of beeps:
Move the fire selector switch to FULL AUTO to enter that branch.
Selecting & Saving a Setting
-
Pull the trigger to cycle through the available options shown in the table above
-
The ETU confirms each option with beeps
-
Press and hold the trigger to save your chosen setting
Exiting Programming Mode
-
Switch the selector to SAFE to exit programming
To adjust another feature:
-
Switch FULL AUTO → SEMI
-
Pull the trigger to select a new branch
-
Repeat the steps above
Programmable Fire Modes EXPLAINED
AUTO Selector Position (Fire Mode Options)
-
Full Auto - Continuous BB fire whilst pulling and holding the trigger
-
Semi-Auto - Shoot one BB with each trigger pull
-
3-Round Burst - Fires three BBs per trigger pull
-
5-Round Burst - Fires five BBs per trigger pull
Useful for CQB setups, site-limited fire modes or preferred playstyles.
SEMI Selector Position (Advanced Trigger Modes)
-
Standard Semi-Auto
-
Binary Trigger
-
Fires once when the trigger is pulled
-
Fires again when the trigger is released
-
Two-Stage Trigger/AUG Mode (20%)
-
A light pull (20%) fires a single BB
-
A full trigger pull fires continuous BBs
-
Sniper Mode
-
Enforces a 2-second delay between shots
-
A beep confirms when the next shot is ready
AUG Platforms: The trigger adjustment screw must be fully loosened for reliable operation.
Trigger Sensitivity (Trigger Pull Distance)
Control how far the trigger must be pulled before firing:
-
20%
-
40%
-
60%
-
80%
-
100%
The trigger adjustment screw can be used to fine-tune trigger feel and reset.
Pre-Cocking Adjustment
Pre-cocking improves trigger response by holding the piston partially retracted.
-
Level 1 - Lowest pre-cocking setting
-
Level 2
-
Level 3
-
Level 4
-
Level 5
-
Level 6 - Highest pre-cocking setting
Higher levels offer a snappier response, but can increase wear on internal components.
Active Brake
-
ON – Stops the motor immediately after firing
-
OFF – Allows the motor to coast naturally
If your platform has a brushless motor, active braking must be OFF to avoid damage.
FACTORY RESET - WHEN & WHY IT’S REQUIRED
A factory reset is essential:
-
After installing or reinstalling an ETU
-
If the replica behaves inconsistently
-
After failed programming attempts
Skipping this step can cause ETU functionality issues.
How to Restore Factory Settings
-
Set the selector switch to SAFE
-
Gently pull the trigger fully back (do not force it)
-
Keeping the trigger held back, connect the battery
-
After connection:
-
Wait 5 seconds
-
Listen for a beep
-
The beep confirms the reset is complete
A factory reset always requires trigger recalibration afterwards.
TRIGGER SETUP (CALIBRATION)
Trigger calibration teaches the ETU the trigger’s full range of movement. Without this step, the ETU will not function correctly.
How to Calibrate the Trigger
-
Set the selector switch to SAFE
-
Connect the battery
-
Do nothing:
-
Wait 3 seconds → beep
-
Wait another 3 seconds → beep
-
Pull the trigger fully and hold for 5 seconds
-
A beep confirms successful calibration
Your ETU is now fully configured and ready for use.
TROUBLESHOOTING TIP
If the replica fails to fire, behaves unpredictably, or won’t enter programming mode:
Perform a factory reset and trigger calibration again from the start.
Final Thoughts
ETUs are one of the best upgrades you can make to an AEG, but correct setup is key. Taking a few minutes to follow the proper setup and programming process will save hours of frustration in the safe zone.
If you require further support or tech advice, reach out to us via our Contact Us page.